How do I keep a crawl space vapor barrier in good shape?
Inspect it in spring and fall and after anyone works under the house. Look for tears, lifted seams, edges pulled off the walls and water pooled on top. Patch damage with tape made for the liner, protect the paths to equipment, keep stored items and sharp debris off it, and fix whatever put water on top of it.
Free to ask. Local shops send quotes, and you pay only when you book one.
By Kasra Taheri, Founder, LoclisPublished
Researched and drafted with AI, then checked claim by claim against the sources listed below before it was published. Prices and rules change; the dates beside each source say when it was last checked.
Step by step
Read when to stop and call a pro, further down this page, before you start.
Step 1: Inspect twice a year
In spring and fall, check the crawl space for ponding, high moisture, insects and animal activity, along with the liner itself.[3]
Step 2: Check after every service visit
Look over the liner after a plumber, electrician, HVAC tech or pest company has been under the house, since tears often happen then.[1]
Step 3: Walk the seams
Look for lifted or open seams; a liner works only when the joints stay overlapped and sealed.[1]
Step 5: Patch tears
Clean and dry the area, then seal tears with tape or mastic accepted by the liner's manufacturer, overlapping well past the damage.[2]
Step 6: Protect the traffic paths
Lay carpet runners or mats from the access door to the furnace, water heater and other equipment people visit.[1]
Step 7: Keep storage off it
Keep boxes, lumber and sharp debris out of the crawl space so nothing punctures or traps moisture on the liner.[1]
Step 8: Find water on top
If water pools on the liner, find the source, such as a leak, a sweating duct or rain at a vent, before drying it.[1]
Step 9: Check the sump and drain seals
Make sure the liner is still sealed around any sump lid and floor drain, and that the lid is on tight.[1]
Step 10: Keep the inspection gap clear
Leave the strip of bare wall at the top of the foundation uncovered so termite inspections can still be done.[2]
Step 11: Test the alarms
Replace batteries in any water alarm and humidity monitor and confirm they still read and sound.[2]
Keep a crawl space vapor barrier in good shape by looking at it on a schedule, patching it as soon as it tears, keeping traffic and storage off it, and dealing with any water that collects on top. A liner rarely fails all at once. It fails a little at a time: a torn corner where the plumber knelt, a seam that lifted, an edge that slid down the wall.
It is worth the attention. The National Park Service notes that heavy plastic sheeting laid over damp crawl spaces, can have remarkable success in stopping vapor diffusion from damp ground into buildings,[3] and the Department of Energy's crawl space guide warns the reverse: Improper installation of the vapor barrier will allow ground moisture to infiltrate the crawlspace and raise the relative humidity.[1]
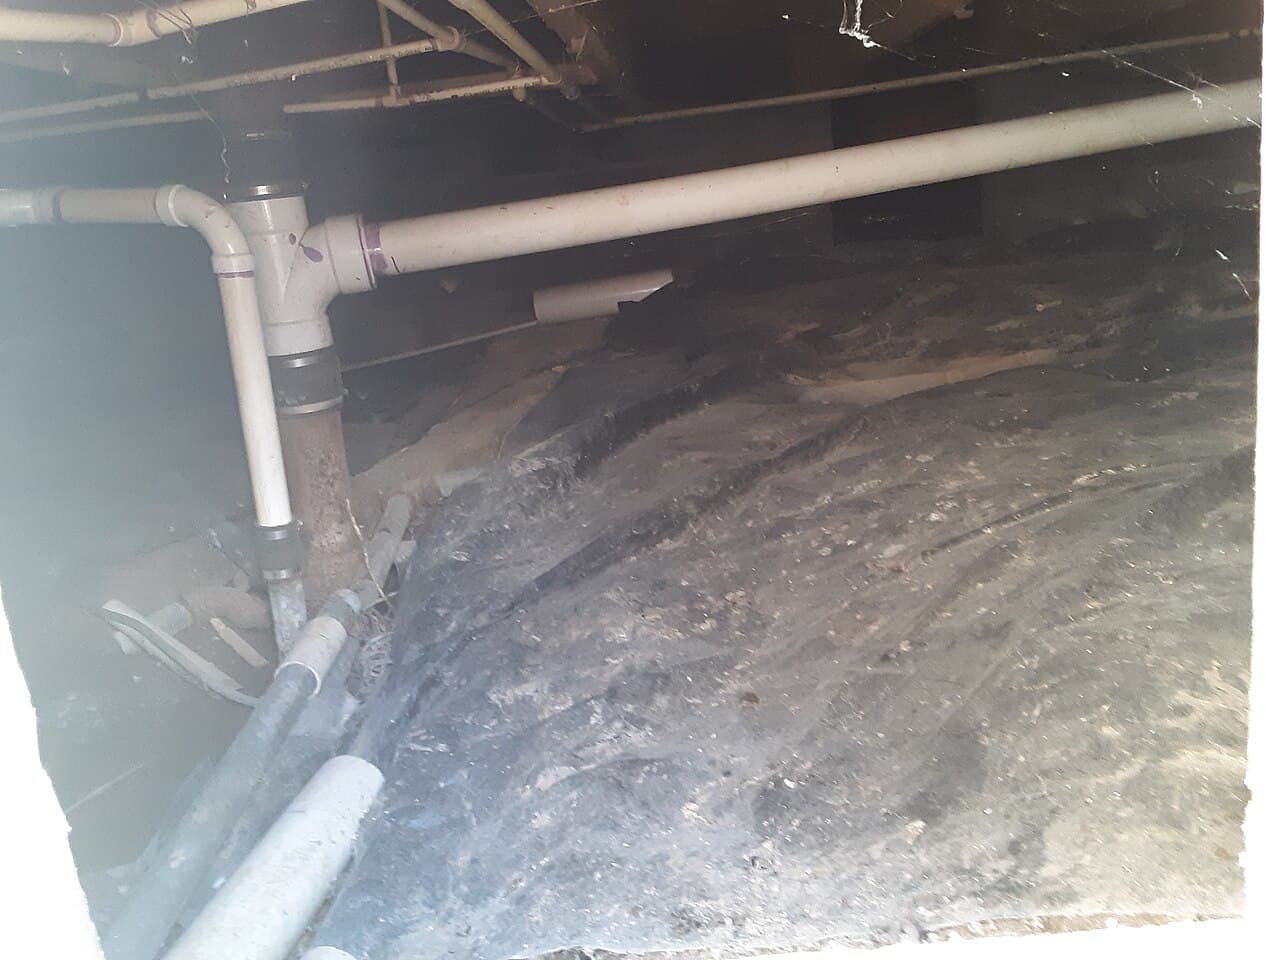
Inspect on a schedule
Twice a year, in spring and fall, is a sensible rhythm, along with any time after a storm that put water in the yard. The Park Service's maintenance list for crawl spaces is short: Check crawl space for animal infestation, termites, ponding moisture, or high moisture content.[3] Add the liner itself to that list.
Look again after anyone has worked under the house. The DOE guide makes this the last step of any crawl space job: Any tears or rips in the vapor barrier that might have occurred during other repairs must be sealed[1] before the work is done. Ask each tradesperson to check before they leave, and look yourself.
What to look for
- Seams. How they should look depends on the system. For a simple ground cover in a vented crawl space, the Virginia Energy Savers Handbook says: "Lap the seams 12 to 18 inches, but don’t bother to seal them."[4] For a sealed crawl space, the DOE's method is "Lap the vapor barrier a minimum of 12 in. at sheet joints, and tape seal."[1] In a sealed system, an open seam is a leak.
- Edges. In a sealed system the liner runs up the walls and up interior columns from a minimum of 4 in. to a maximum of 12 in. above the crawlspace floor.[1] Look for edges that have slid down or pulled away. Closed crawl space guidance explains why they fail: "Mechanically fasten the liner material to the perimeter wall in addition to sealing it to the wall. Adhesives, sealants or tapes alone may be insufficient to support the material."[2]
- Tears and punctures. Most are along the path from the access door to the furnace, water heater, sump or plumbing cleanouts.
- Water on top. Puddles on the plastic come from above or from outside, not from the soil. See why a crawl space gets wet to find the source.
- Around the sump and drains. The liner should be sealed to the pit, and the DOE says to make sure crock pits have well-sealed lids that fit tightly.[1]
Patch it the right way
Small tears are a homeowner job. Clean and dry the area first so tape will stick. For seams and patches, the closed crawl space reference recommends: "Use duct mastic with embedded fiberglass mesh tape to seal seams in crawl space vapor retarder materials."[2] If you use a tape or sealant instead, ensure that the product is accepted for use by the manufacturer of the material and will provide long-term performance.[2] For a larger hole, cut a patch of the same liner material that overlaps well past the damage on every side and seal its edges.
If an installer put in your system, ask whether they left one of the items quality installers often include: A repair kit for fixing small amounts of damage to the vapor retarder after the house is occupied.[2]
Protect it from traffic and storage
The thinnest liners are the easiest to damage. The guidance is plain: "Protect 6-mil un-reinforced polyethylene ground vapor retarders to avoid damage in areas that will be accessed for servicing of mechanical equipment. Thicker, reinforced polyethylene materials are more durable."[2] For a sealed crawl space, the DOE specifies a minimum 10-mil or cross-laminated puncture-resistant 6-mil poly vapor barrier.[1]

Protect the paths with indoor/outdoor carpet runners, carpet protection mats[1] from the door to each piece of equipment. Keep the crawl space empty of stored boxes, lumber and sharp debris, which puncture the plastic and hold moisture against it. A sign at the door helps too: A posted sign informing anyone entering the crawl space of the system components maintaining the integrity of the system[2] reminds every technician what not to disturb.
Keep pest control in mind
Pest inspectors need to see the top of the foundation wall. In a sealed crawl space the installer should leave a minimum 3” termite inspection gap between the top of the wall vapor retarder and the top of the masonry wall.[2] Do not cover that strip when patching. If a pest control company treats the crawl space, ask it to reseal anything it lifts or cuts.
Keep the alarms working
A water alarm at the low spot is cheap insurance. These alarms alert the homeowners of potential pipe leaks or other unwanted water on the crawlspace floor that otherwise may go unrecognized for long periods of time.[1] Change the batteries in the alarm and any humidity monitor at each inspection.
Why the details matter
Every gap lets the soil back in. Moisture in damp soil, such as in a crawl space, can evaporate into the air, raise the relative humidity in that space[3] and the rooms above. Plastic is used because membranes are less expensive and easier to install[5] than a concrete slab, but it is also easier to damage, which is why the upkeep matters. If the liner does get wet from a leak, dry it out quickly; the EPA says that if wet materials are dried 24-48 hours after a leak or spill happens, in most cases mold will not grow.[6]
Stop and call a pro if
- Water pools on or under the liner after every rain.
- Large sections are torn, brittle or missing, or the liner needs replacing wall to wall.
- The edges keep pulling off the walls even after resealing.
- You find mold on the framing, soft wood or signs of termites or carpenter ants.
- A sealed crawl space's humidity is climbing even though the liner looks intact, which points to the dehumidifier or the air supply.
For the bigger picture, see how to keep a crawl space dry and how to lower crawl space humidity. More is under pest control answers, and you can browse crawlspace and moisture services or pest control businesses near Blacksburg.
Describe your crawl space liner repair once and get quotes from licensed pros.
Common questions
- How long does a crawl space vapor barrier last?
- It depends on the material and how often people crawl over it. Thin, unreinforced sheeting tears easily where technicians walk to equipment; thicker, reinforced liners hold up longer. A liner that is patched, protected along the paths and kept free of standing water can last many years.
- What tape should I use to patch a vapor barrier?
- Use a tape or sealant the liner's manufacturer accepts for that material, or duct mastic with fiberglass mesh tape, which closed crawl space guidance recommends for seams. Ordinary cloth duct tape tends to let go in a damp crawl space.
- Should the seams be taped?
- In a vented crawl space with a simple ground cover, the Virginia Energy Savers Handbook says to lap seams 12 to 18 inches without sealing them. In a sealed or encapsulated crawl space the seams must stay taped, because the liner is part of the air seal.
- Why is there water under my vapor barrier?
- Water under the plastic usually comes from the soil or from water running in from outside and under the edges. Some dampness under a ground cover is normal; puddles that grow after rain mean a drainage problem outside that the liner cannot fix.
- Can a pest control treatment damage the liner?
- Treatments and inspections mean people crawling over it and sometimes lifting it at the walls. Ask the company to reseal anything it moves, and keep the inspection gap at the top of the foundation wall clear so they do not need to cut the liner.
Sources
- [1] Guide to Closing and Conditioning Ventilated Crawlspaces (January 2013), U.S. Department of Energy, Building America Program (IBACOS for NREL). Checked October 26, 2026.
- [2] Designing Closed Crawl Spaces: A Quick Reference (February 2012), Advanced Energy, published by ENERGY STAR. Checked October 26, 2026.
- [3] Preservation Brief 39: Holding the Line: Controlling Unwanted Moisture in Historic Buildings, U.S. National Park Service. Checked October 26, 2026.
- [4] The Virginia Energy Savers Handbook (third edition), Virginia Department of Mines, Minerals and Energy. Checked October 26, 2026.
- [5] Moisture Control Guidance for Building Design, Construction and Maintenance (December 2013), U.S. Environmental Protection Agency. Checked October 26, 2026.
- [6] A Brief Guide to Mold, Moisture and Your Home, U.S. Environmental Protection Agency. Checked October 26, 2026.
Want a pro to handle it?
Describe the job once. Licensed local businesses send quotes, and you pay only when you book one.
Get a quote from a local pro