How do I fix a leaking pipe under the sink?
Most leaks under a sink come from a loose slip nut or worn washer on the plastic drain trap, a split supply line, or a failing shut-off valve. Dry everything, run water to find the drip, then snug the slip nut by hand plus a quarter-turn with pliers, reseat or replace its washer, or replace a split supply line. Water coming from inside the wall needs a plumber.
Free to ask. Local shops send quotes, and you pay only when you book one.
By Kasra Taheri, Founder, LoclisPublished
Researched and drafted with AI, then checked claim by claim against the sources listed below before it was published. Prices and rules change; the dates beside each source say when it was last checked.
Step by step
Read when to stop and call a pro, further down this page, before you start.
Step 1: Clear and dry the cabinet
Empty the cabinet, wipe every pipe and joint dry, and lay a dry towel on the cabinet floor so a new drip shows where it lands.
Step 2: Watch with nothing running
Leave the faucet off for a while; a drip that appears with nothing running points to the shut-off valves, the supply lines or the faucet's own hoses.[1]
Step 3: Test the drain with paper towels
Fill the sink with the stopper in, wrap paper towels around each drain joint, then release the water and see which towel gets wet.[4]
Step 4: Shut off the water
Before touching a supply fitting, turn the shut-off valves under the sink clockwise until tightly closed and open the faucet to confirm the water is off.[3]
Step 5: Snug the slip nut
Tighten a dripping slip nut on the trap by hand, then finish with a quarter-turn using pliers, snug but not overtightened.[5]
Step 6: Reseat the washer
If it still drips, set a bucket under the trap, loosen that nut, and check that the washer is whole and sits with its tapered side facing the fitting.[5]
Step 7: Replace worn trap parts
Replace a cracked washer, or a trap too corroded to seal, with a slip-joint trap kit of the same size, and leave thread tape off the slip joints.[5]
Step 10: Dry what got wet
Dry the cabinet floor and anything stored there within 24 to 48 hours; in most cases mold will not grow on materials dried that quickly.[8]
Start by finding the drip
Most leaks under a sink are at a joint you can reach with your hands: a slip nut on the plastic drain trap, a garbage disposal connection, a flexible supply line, or the shut-off valve where that line starts. Finding which one is leaking is most of the job, because each has a different fix.
Two things narrow it down: how often the leak happens and where the water shows up.[2] Pay attention to timing.
- Leaks all the time, even with nothing running. That is the pressurised supply side. If a kitchen faucet leaks under the sink 24 hours a day, check three places: the home shut-off valves (angle stops), the house supply lines that lead to the faucet, and the faucet's own supply lines.[1]
- Leaks when water goes down the drain. That usually points to the drain side: the trap, the tailpiece under the sink, or a disposal.
- Leaks after the faucet has been turned on and off. If it leaks only after the faucet has been used, the cluster of faucet hose connections below the sink is the usual suspect.[1]
The paper-towel test below tells the two apart: a towel on a drain joint gets wet only when the basin drains.
Empty the cabinet, wipe every pipe and fitting dry, and put a dry towel on the cabinet floor. Then wait a while with nothing running. If the towel stays dry, test the drain: plug the sink and fill it, wrap paper towels around each joint you suspect, then pull the stopper and let the water drain. A wet towel marks the leaking joint.[4]
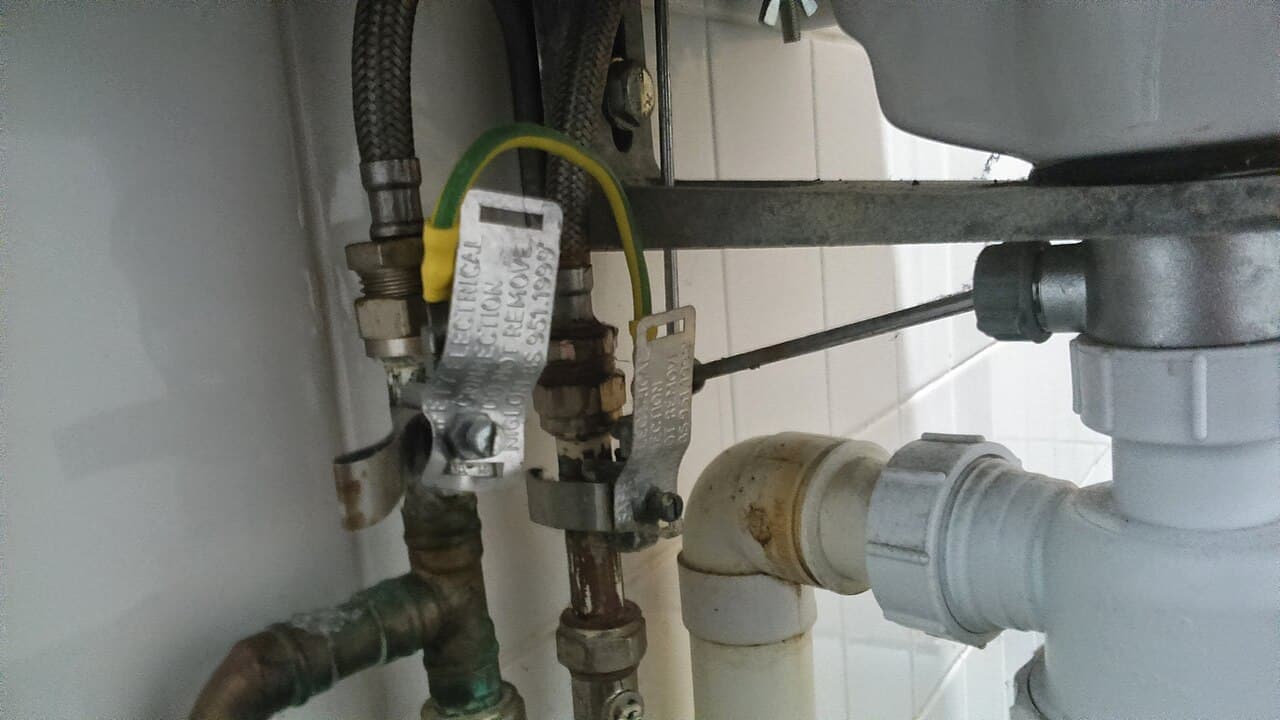
Fixing a leaking drain trap
The curved trap under most sinks is held together with slip-joint nuts. Each nut squeezes a washer against the pipe to make the seal. The nut goes on first, then the washer, with the tapered side of the washer facing the fitting.[5] A washer that has slipped, flattened or cracked is the usual reason a trap drips.
Start with the simple fix. Hand-tighten the nut, then finish with a quarter-turn using pliers, snug but not overtightened.[5] Do not lean on it. Excessive force can crack plastic fittings or strip threads, causing leaks.[5]
If snugging the nut does not stop it, put a bucket under the trap, loosen the nut and let the trap water drain. Clean both pipe ends, look at the washer, and seat it again the right way round. Slip-joint connections seal with washers, not thread tape,[5] so wrapping tape around the threads will not help.
When the washer is split or the trap is cracked, replace it. Trap kits are sold by size: most bathroom sinks use 1-1/4 inch and most kitchen sinks 1-1/2 inch.[5] Take the old part to the store to match it. On older chrome or brass traps, if metal parts are severely corroded, replacing them may be the safest option.[5]
Whatever you change, test it. Run water for 30 to 60 seconds and inspect every connection; if a leak appears, tighten the nearest nut slightly until it stops.[5] Fill and drain the sink once as well, since a full basin puts more water through the trap than a running tap.
If the sink has a garbage disposal
A disposal is an electrical appliance, and its plug, switch or wiring is often in the same cabinet. Before you put your hands on it, unplug it or switch it off at the breaker, and do not touch electrical equipment if it is wet or if you are standing in water.[9]
A disposal adds three joints to the paper-towel test: the sink flange at the top, the drain discharge elbow on the side, and the dishwasher connector.[4] If the outside of the housing is wet, check the dishwasher connector and its clamp for damage or wear and replace them if needed; they need to be tight. If water drips from the metal plate on the bottom, tighten any loose screws on the drain discharge elbow.[4] A damaged discharge gasket lets water travel down between the shell and the disposal and drain out by the cover plate on the bottom.[4] If it still drips from the bottom once the elbow screws are snug, leave the gasket and the disposal to a plumber.
Fixing a leaking supply line
Before you touch anything on the supply side, shut the water off. Turn the shut-off valves clockwise until they are tightly closed, then open the faucet to make sure the water is completely off.[3] Sometimes the only shut-off is the main valve for the whole house, usually near the water meter.[3]
A split or tear in the supply line between the shut-off and the faucet means replacing that line.[2] The new line's inlet has to match the shut-off valve's outlet and its outlet has to match the faucet's inlet. For length, measure from the valve to the faucet inlet and add a few inches.[6] Taking the old line to the store is the easy way to match it.
Line up the threads with the valve outlet and tighten the nut by hand until it is watertight.[6] If it leaks once the water is back on, tighten the nut another quarter of a turn by hand. If it still leaks, take the connection apart and check that the line is lined up and the right length.[6] Thread sealant is not needed on a supply line connection.[6] If the package for your line gives different instructions, follow them.
Water leaking from around the handle of a shut-off valve means its seals have failed and the valve needs replacing.[2] That is a different job. Replacing a valve means shutting off the main and draining the pipes, and on copper pipe some valves are soldered on.[6]
Stop and call a pro if
- Water is coming from inside the wall or floor, or the cabinet floor keeps getting wet while every joint stays dry. Moisture or mold on walls, ceilings or floors can mean a pipe is leaking behind the scenes and needs a professional.[7]
- The pipe itself is leaking, not a joint: a pinhole, a crack or a green, crusty spot on copper. A leaking pipe that might need replacing or re-soldering is a job worth paying a plumber for.[10]
- A shut-off valve leaks or will not close. Replacing it means working with the house's main shut-off.
- Water is dripping from the bottom of the disposal onto its plug, outlet or wiring, or the disposal is wired in with no plug. Turn off the electricity to prevent electric shock if it is safe to do so,[9] at the breaker, and call a pro.
- The main shut-off or the meter is leaking. That is outside an under-sink repair.
- The cabinet has mold. If wet materials are dried within 24 to 48 hours of a leak, in most cases mold will not grow.[8] If mold covers more than about 10 square feet, follow the EPA's Mold Remediation in Schools and Commercial Buildings, which applies to homes too, and if you hire a contractor, choose one with experience cleaning up mold.[8]
Getting help in Virginia
If the leak is not under the sink, read how to find a hidden water leak, and if you are deciding whether this is a plumber's job, when you need a plumber for a water leak covers the signs. A faucet that drips from the spout is its own repair: see leaky faucet repair. Loclis lists DPOR-licensed plumbing businesses with their licence number and class: find plumbers in Blacksburg, browse leak repair, or read more plumbing answers.
When you want a plumber to look at it, describe the leak once and licensed local plumbers quote it.
Common questions
- Should I put plumber's tape on the slip nuts of a sink trap?
- Usually not. Slip-joint connections seal with a washer pressed against the fitting, not with thread tape; tape is for threaded pipe joints. If a slip nut leaks, check that the washer is whole and sits with its tapered side toward the fitting, then tighten the nut by hand plus about a quarter-turn with pliers.
- How tight should a plastic slip nut be?
- Snug, not forced: hand-tight, then a quarter-turn with pliers. Too much force can crack plastic fittings or strip the threads, which causes the leak you were trying to stop.
- The leak only happens when the sink drains. Is it the drain or the faucet?
- Usually the drain: a trap nut, a tailpiece or a disposal connection. Fill the sink, wrap paper towels around each joint and let the water go; the wet towel shows the joint. If the towels stay dry and water still appears after using the faucet, look at the faucet's own hoses.
- Can I replace the shut-off valve myself?
- It is a bigger job than it looks. The water to the whole house has to be shut off at the main and the pipes drained, and on copper pipe some valves are soldered in place. If a valve leaks at its handle or will not close, that is a good point to call a plumber.
- What if the cabinet floor is swollen or moldy?
- Fix the leak first, then dry everything quickly; the EPA says that if wet materials are dried within 24 to 48 hours, in most cases mold will not grow. A small patch of mold can often be cleaned up by the homeowner, but if it covers more than about 10 square feet, the EPA's advice is to follow its Mold Remediation in Schools and Commercial Buildings guide, and, if you hire someone, to pick a contractor with experience cleaning up mold.
Sources
- [1] Kitchen Faucet: Leaking Under The Sink Base, Moen. Checked October 26, 2026.
- [2] Bathroom Faucet: Leaking Under The Sink Base, Moen. Checked October 26, 2026.
- [3] How To Turn Off The Water Supply To The Faucet, Moen. Checked October 26, 2026.
- [4] Leak Underneath: Existing Garbage Disposal, Moen. Checked October 26, 2026.
- [5] How to Install a P-Trap (project guide), Oatey. Checked October 26, 2026.
- [6] Oatey 101: Stops and Supply Lines, Oatey. Checked October 26, 2026.
- [7] Detect and Chase Down Leaks at Home checklist, U.S. Environmental Protection Agency, WaterSense. Checked October 26, 2026.
- [8] A Brief Guide to Mold, Moisture and Your Home, U.S. Environmental Protection Agency. Checked October 26, 2026.
- [9] Floods, Ready.gov, Federal Emergency Management Agency. Checked October 26, 2026.
- [10] Virginia Energy Savers Handbook, Chapter 9: Fixing Water Leaks, Virginia Tech, Virginia Energy Savers program. Checked October 26, 2026.
Want a pro to handle it?
Describe the job once. Licensed local businesses send quotes, and you pay only when you book one.
Get a quote for Plumbing Repair