How do I install a battery-powered video doorbell?
Charge the battery first, then add the doorbell in its app while it is still in your hand and check the picture. Pick a spot about 4 feet off the ground, fix the bracket with screws (anchors in masonry), hook the doorbell on, lock it with the security screw and test it. Leave any hookup to existing doorbell wiring to a licensed electrician.
Free to ask. Local shops send quotes, and you pay only when you book one.
By Kasra Taheri, Founder, LoclisPublished
Researched and drafted with AI, then checked claim by claim against the sources listed below before it was published. Prices and rules change; the dates beside each source say when it was last checked.
Step by step
Read when to stop and call a pro, further down this page, before you start.
Step 2: Set it up in the app
Add the doorbell in its app with your Wi-Fi details and use Live View to check the picture before you mount anything.[1]
Step 4: Prepare the surface
On wood, screw in directly. On brick, stone or stucco, drill pilot holes with a 1/4 inch masonry bit and tap in the wall anchors.[1]
Step 5: Mount the bracket or doorbell
Use only the screws supplied. With a removable battery, take the battery out first, screw the doorbell to the wall and put the battery back in.[1]
Step 6: Fit the doorbell and secure it
Hook the doorbell on the bracket, press it flush, then tighten the security screw with the supplied tool.[1]
Step 7: Test it
Press the button, check the notification on your phone, and look at the live picture in daylight and after dark.
Charge it, add it in the app, mount the bracket and hook the doorbell on. A battery-powered video doorbell is a screwdriver job, and the order matters: set it up and check the picture before you put a hole in the wall.
Before you start
You need your Wi-Fi name and password, a phone with the maker's app, a Phillips screwdriver and, for brick or stucco, a drill. Most doors need nothing else. Walk to the door and check that your Wi-Fi reaches it, because a doorbell with a weak signal is the most common reason these installs go badly.
Read the manual for your exact model. The steps below follow the manufacturers' own guides for Ring and Google Nest battery doorbells, and the details differ between models.
The installation, in order
Charge first. For a doorbell with a built-in battery: "Fully charge the built-in battery by plugging it into a USB power source using the provided charging cable."[1] On a model with a removable battery: "Charge the battery until only the green light remains lit."[1] Google's guide adds: "Keep it plugged in during setup so that it can connect to the app and the Wi-Fi network."[2]
Set it up in the app next. Ring's guide has you do this before mounting: "Open the Ring app and tap Set Up a Device. Once complete, use Live View to check your camera feed and video quality."[1] Doing it now means you find a Wi-Fi problem while the doorbell is still in your hand.
Choose the spot. Ring says: "For the best results, mount the doorbell 4 feet (1.2 meters) above the ground."[1] Hold it against the wall, look at the live view on your phone and move it until the view covers the step and the path. If the door sits in a corner, a wedge helps. Google's wedge, for example: "This wedge can angle your doorbell horizontally up to 20°."[2]
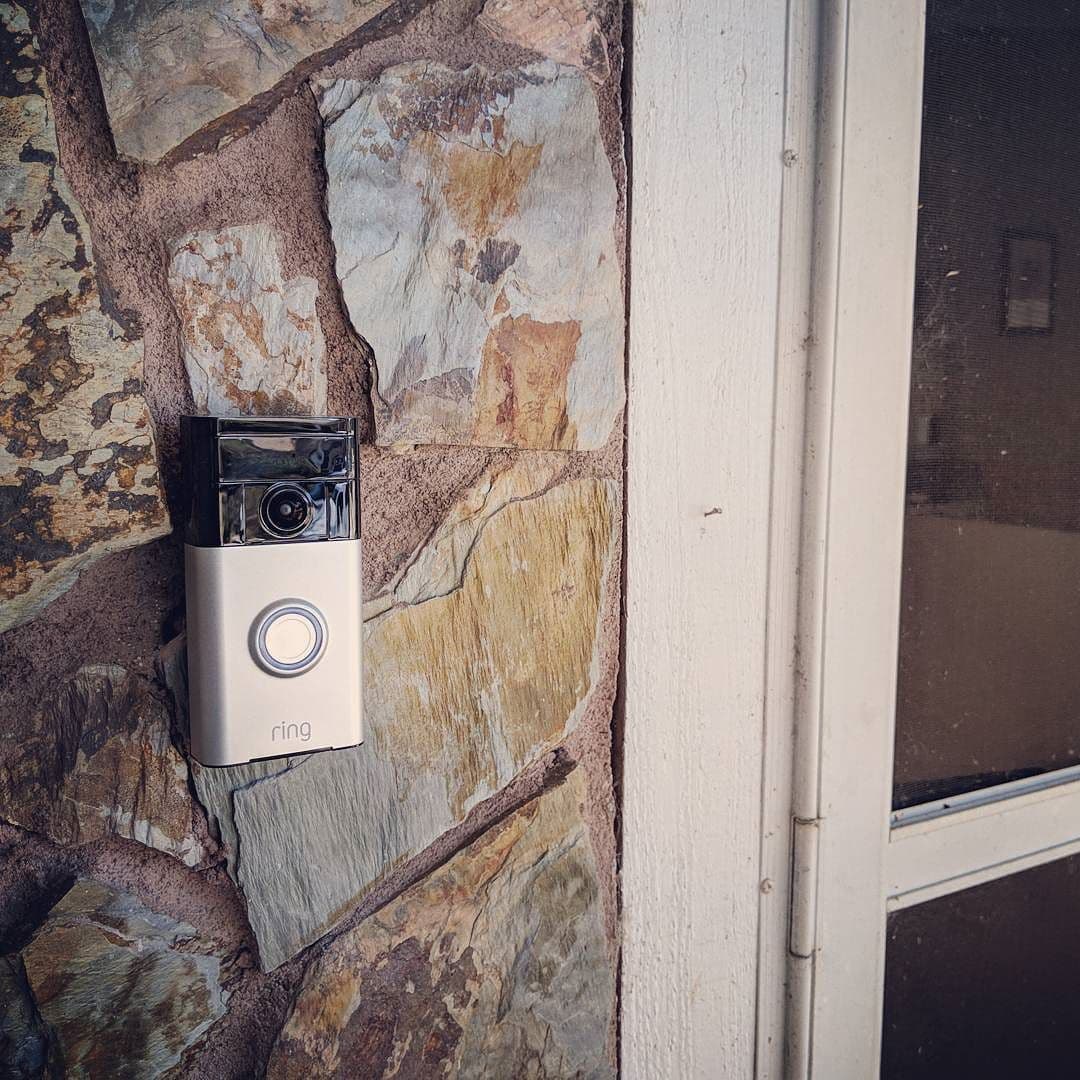
Prepare the surface. On wood or siding backed by wood, Ring says: "Drill and wall anchors are not needed."[1] On brick, stone or stucco, mark the holes through the bracket, then "drill pilot holes using a 1/4 inch (6 mm) drill bit"[1] and tap in the anchors that came in the box. Drill into the mortar joint rather than the brick face where you can, because it is softer and does less damage.
Mount and secure. Fix the bracket with the screws in the box, or, on a removable-battery model, take the battery out and screw the doorbell itself to the wall, then put the battery back. Hook the doorbell onto the bracket, press it flush and tighten the security screw with the little tool supplied. Use only the screws that came with the doorbell. Ring warns: "If you use the wrong screws to secure the faceplate, you could damage the battery during installation, create a fire hazard, and be seriously injured."[1]
Test and secure it
Press the button and confirm that your phone rings and the live view opens. Check the picture in daylight and again after dark, when glare from porch lights shows up. Set motion zones so the street and your neighbour's door are not recording.
Then deal with the account. Accept any firmware update the app offers: many software updates are created to fix security risks.[3] Use a password nobody else has used: CISA's advice is to "Create long, random, unique passwords with a password manager for safer accounts."[4] Turn on two-step sign-in if the app offers it.
What about power from existing doorbell wiring?
Some battery models can take a trickle charge from an existing transformer or doorbell wire. Ring's rule is: "Use only one power source."[1] That hookup is a different job from the one above, and it is where a licensed electrician comes in (see below).
Stop and call a pro if
- You want to connect the doorbell to existing doorbell wiring or a transformer. Ring's guide says: "Disconnect power to installation area at your circuit breaker or fuse box before beginning installation."[1] It also says: "Installation by a qualified electrician may be required in your area."[1]
- You find bare, damaged or unexpected wires behind the old button.
- The wall will not hold a screw, because the siding, trim or masonry is crumbling.
- The door frame or porch is out of reach without a tall ladder.
- The battery swells, smells or gets hot while charging. Stop using it and contact the maker.
Getting help in Virginia
If a pro is the better route, see how much it costs to install a video doorbell in Virginia for what drives a quote. To see where cameras make sense around the house, read where to put security cameras on a house. Browse Security & Smart Home or see more smart home answers.
When you would rather not do it yourself, describe the job once and local pros quote it.
Common questions
- Do I need an electrician for a battery video doorbell?
- Not for a fully wire-free install. You charge it, screw on a bracket and hook the doorbell on. Connecting it to existing doorbell wiring or a transformer is different: Ring's guide says to disconnect power at your circuit breaker or fuse box first, and that installation by a qualified electrician may be required in your area.
- How high should I mount a video doorbell?
- Ring says that for the best results you should mount the doorbell 4 feet (1.2 meters) above the ground. Check the live picture before you drill, because the best height depends on your porch and who you want in frame.
- Can I install one on brick or stucco?
- Yes, with a masonry bit. Ring's guide has you drill pilot holes using a 1/4 inch (6 mm) drill bit and insert the supplied wall anchors. If the surface crumbles or you cannot get a solid fix, ask a handyman rather than forcing it.
- Can I use a battery doorbell in a rental?
- Often, but ask the landlord or HOA first, because mounting means screw holes. Some brands sell a no-drill mount. Keep the original button if you swap one out, so it can go back when you leave.
- What if the doorbell will not connect to Wi-Fi?
- Keep it plugged in and close to the router during setup, then move it to the door. If the signal at the door is weak, a Wi-Fi extender or a mesh node nearer the door usually fixes it.
Sources
- [1] Installing battery-powered doorbells, Ring Help. Checked October 27, 2026.
- [2] Install Nest Doorbell (battery), Google Home and Nest Help. Checked October 27, 2026.
- [3] Update Software, Cybersecurity and Infrastructure Security Agency (CISA). Checked October 27, 2026.
- [4] Use Strong Passwords, Cybersecurity and Infrastructure Security Agency (CISA). Checked October 27, 2026.
Want a pro to handle it?
Describe the job once. Licensed local businesses send quotes, and you pay only when you book one.
Get a quote from a local pro