How do I replace rotten deck boards?
Back out the fasteners, lift out the rotten board and check the joists under it before anything goes back. If the framing is firm, cut a matching board so each end lands on a joist, seal the cut ends, and fasten it at every joist with two corrosion-resistant screws or nails. Soft joists, posts or a loose ledger make it a contractor's job.
Free to ask. Local shops send quotes, and you pay only when you book one.
By Kasra Taheri, Founder, LoclisPublished
Researched and drafted with AI, then checked claim by claim against the sources listed below before it was published. Prices and rules change; the dates beside each source say when it was last checked.
Step by step
Read when to stop and call a pro, further down this page, before you start.
Step 1: Mark the bad boards
Walk the deck and press a screwdriver tip into any board that looks dark, split or spongy, and mark each one that gives.
Step 2: Check what the wood is
If the deck was built before 2004 and is not cedar or redwood, treat it as CCA-treated wood and work with goggles, gloves and a dust mask.[5]
Step 3: Back out the fasteners
Remove the screws with a driver, or work the nails up with a flat bar and a block under it so you do not crush the boards next to it.
Step 4: Lift the board out
Take the board out in one piece if you can, or cut it between joists and lift out the sections.
Step 5: Probe the joists
Push the screwdriver into the top of every joist the board sat on; if it sinks in or the wood crumbles, stop and call a contractor.
Step 6: Measure the new board
Match the thickness and width of the boards around it, and plan the length so each end lands on the middle of a joist.
Step 7: Cut and seal the ends
Cut the board to length and brush a water-repellent preservative onto the cut ends before you fit it.[7]
Step 8: Set the gap
Match the gap of the neighbouring boards; Fairfax County's details lay wet treated decking tight so it dries to about a 1/8-inch gap.[1]
Step 9: Fasten at every joist
Drive two corrosion-resistant #8 screws or two ring-shank 8d nails into each joist.[1] Pre-drilling near the board ends usually keeps them from splitting.
Step 10: Clean up safely
Collect the sawdust and offcuts, wash your hands, and never burn treated wood.[6]
Step 11: Finish it later
Let a new treated board with a factory water repellent weather for 2 to 3 months before you stain it to match.[7]
Replacing a rotten deck board is usually a one-afternoon repair, as long as the rot stops at the board. The board itself is the easy part. What matters is the wood under it: a joist that is soft where the board sat turns a small repair into framing work for a contractor.
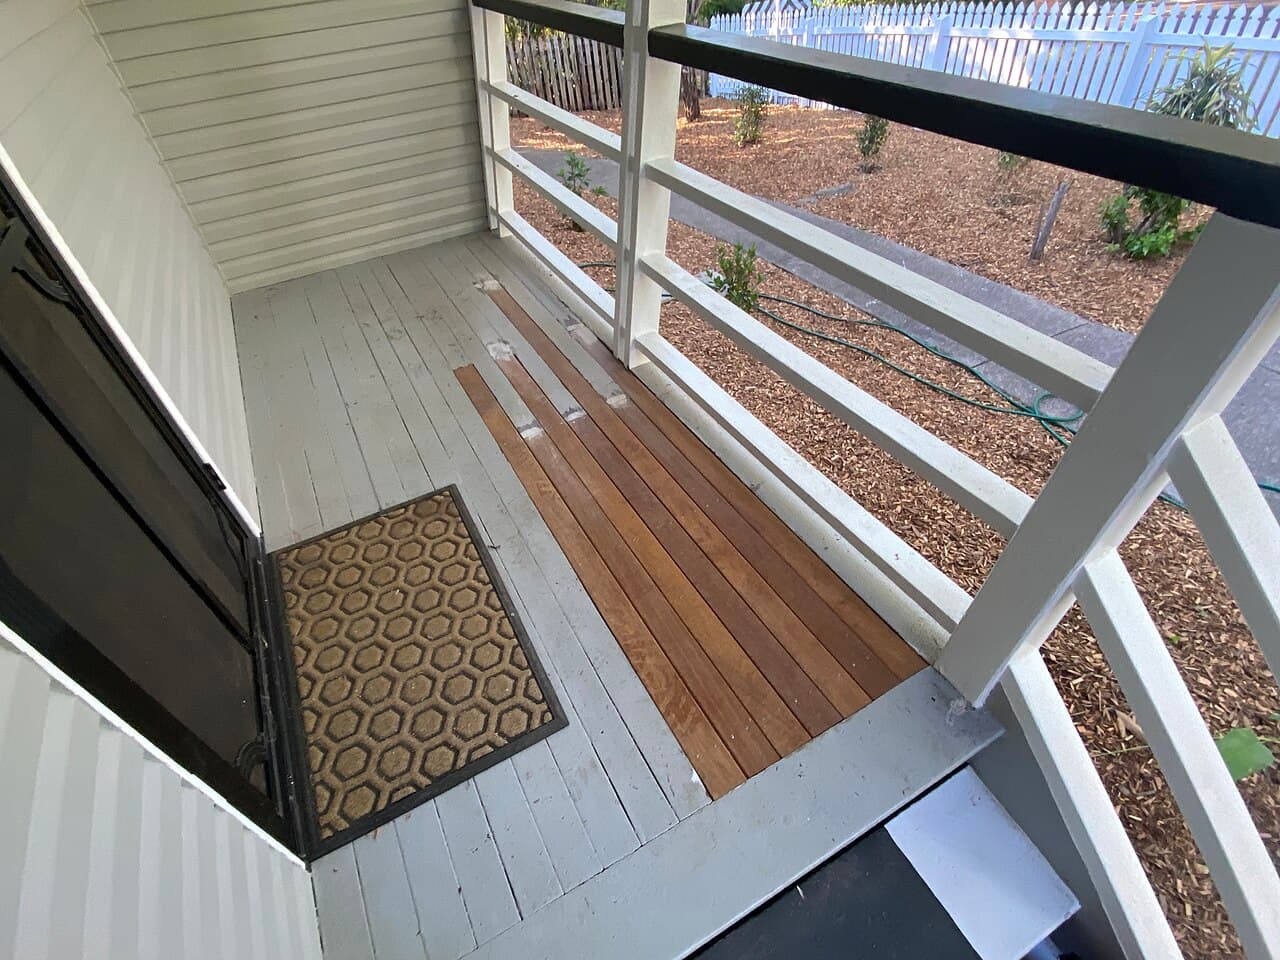
First, make sure it is only the board
A board rots where water sits, and the joist under it gets the same water. Before you buy lumber, look under the deck with a flashlight at the joists, beams and posts below the bad boards. Fairfax County's building official suggests checking that the deck has "no wood rot or splitting or insect damage, including the posts at the ground."[4] Rot in the frame is a safety problem, not just a cosmetic one, and the same checklist asks whether the posts at the ground are sound.[4]
Press a screwdriver into the top edges of the joists you can reach. Sound wood resists. If the tip sinks in easily, or the wood is dark and crumbles or breaks into small cubes, the repair has moved past boards. If you are not sure how to read the ledger where the deck meets the house, see how to tell if a deck ledger board is failing.
Permits and older decks
Whether replacing deck boards counts as an ordinary repair that needs no permit is your local building official's call. The Town of Christiansburg, for example, lists replacing deck floor boards among the deck changes that do not need a building permit, while replacing more than one support post, guardrails or more than three stair risers does.[2] The Virginia Uniform Statewide Building Code requires a permit for work involving any structural component, and exempts ordinary repair work the building official deems minor.[3] If your repair touches anything under the boards, call your local building office first.
Check the age of the deck too. If your deck was built before 2004 and is not cedar or redwood, it was most likely built with wood treated with chromated copper arsenate (CCA), according to the Consumer Product Safety Commission.[5] The EPA advises that you wear goggles and a dust mask when sawing it and wash your hands after handling it, and that you do not burn it, because of the toxic chemicals in the smoke and ash.[6] The CPSC says discarded CCA lumber can usually go to construction and demolition or municipal solid waste landfills, though state or local rules may be stricter.[5] Ask your county or city convenience center before you load the truck.
Choosing the replacement board and fasteners
Take a short offcut of the old board to the lumberyard. Match its thickness first, so the new board sits flush, then its width. Common sizes are five-quarter decking and 2x6.
For wood decks, Fairfax County's typical deck details, written to the 2021 Virginia Residential Code, call for "preservative-treated southern pine, grade #2 or better," and say lumber in contact with the ground must be rated for ground contact.[1] A board on a low deck that sits close to soil is worth buying with the ground-contact rating even if the tag on the old one is long gone.
The same details call for two 8d nails or two #8 screws at each joist, nails that are threaded, ring-shanked or annular grooved, and fasteners that are hot-dipped galvanized, stainless steel or approved for use with preservative-treated lumber.[1] Coated deck screws sold for treated lumber are the easiest choice for a repair, since they pull the board down tight and come out again if you need to adjust.
Two more points from Fairfax County's details: each decking board must bear on at least three joists or on blocking between joists, and on a deck with any post height greater than 2.5 feet, hidden deck fasteners are allowed only with supplemental bracing under the joists.[1] If your deck already uses face screws, stay with them. For composite decking, composite boards are placed and fastened per the manufacturer's instructions,[1] so find the brand and use its matching boards, clips and gaps.
Fitting the new board
Plan the cut so each end of the new board lands on the middle of a joist, with enough wood on either side of the joint for both boards to be fastened. Where several boards are bad, stagger the joints so they do not all fall on one joist.
Gaps let water drain and air dry the boards, so they matter as much as the fasteners. Fresh treated lumber is often still wet and shrinks as it dries. Fairfax County's details lay wet decking with no gap, so that a 1/8-inch gap opens up as it dries.[1] Kiln-dried or composite boards usually go in with the gap you want to keep.
Seal the cut ends before the board goes down. Even with factory-treated lumber, the Forest Products Laboratory still advises treating the ends cut during construction with a water-repellent preservative.[7] End grain takes up water readily, so this small step does a lot.
Pre-drill near the ends, drive the fasteners flush rather than deep, and stand on the board to check that it does not rock or squeak.
Matching the finish
A new board will not match a weathered deck at first. If it came with a factory water repellent, the Forest Products Laboratory says the wood should be "allowed to weather for 2 to 3 months before finishing."[7] Then clean and stain the whole deck, or at least the whole run of boards, so the color blends. See how to stain a deck for that part.
Stop and call a pro if
- A joist, beam or post under the bad boards is soft, cracked or crumbling. Cutting out or adding to framing is structural work.
- The ledger board along the house is wet, rotted or pulling away from the wall.
- Bolts, joist hangers or post brackets are rusty. Fairfax County's building official lists rust or corrosion on the fasteners that connect decks, rails, beams and joists among the things to check,[4] and a corroded connector cannot be judged from above.
- A railing post or guard moves when you push on it.
- The rot covers so much of the deck that you would be replacing most of the boards anyway. That is the point to compare repair and replacement quotes; see whether to repair or replace a deck.
A licensed contractor can open up the framing, tell you what a permit will cover, and quote the structural repair separately from the boards. You can browse deck repair businesses, find handyman businesses around Blacksburg, see how to tell if a deck is safe, or read more handyman answers. When you would rather hand it off, describe your deck repair once, with photos of the boards and the framing underneath, and local businesses can quote it.
Common questions
- Do I need a permit to replace deck boards in Virginia?
- Often not for boards alone, but your local building official decides what counts as a minor, ordinary repair. The statewide building code requires a permit for work on any structural component. The Town of Christiansburg, for example, lists replacing deck floor boards as work that needs no building permit, but requires one for guardrails, for replacing more than one support post and for replacing more than three stair risers. Call your building office before you touch anything under the boards.
- Can I replace just part of a deck board?
- Yes, as long as each new piece ends on the middle of a joist and is long enough to be fastened securely. Fairfax County's typical deck details have every decking board bear on at least three joists or on blocking, so very short patches are worth avoiding. Stagger the joints so they do not all line up on the same joist.
- Should I flip a rotten deck board instead of replacing it?
- Not when it is rotten. Decay usually runs through the board, not just the top face, so a flipped board stays weak. Flipping is sometimes done with sound boards that are only weathered or cupped on top, but a board that is soft anywhere should be replaced.
- What screws should I use for treated deck boards?
- Use fasteners made for preservative-treated lumber. Fairfax County's typical deck details call for fasteners that are hot-dipped galvanized, stainless steel or approved for use with treated lumber, and for nails that are threaded, ring-shanked or annular grooved.
- Why is the new board a different color from the old ones?
- New treated lumber is often wet and greenish or brown, while old boards have weathered gray. The Forest Products Laboratory suggests letting new wood that came with a factory water repellent weather for 2 to 3 months before finishing, so it can absorb stain. After that, cleaning and staining the whole deck evens out the color.
Sources
- [1] Typical Deck Details (version 2021.0, 1/5/2024), Fairfax County Land Development Services. Checked October 26, 2026.
- [2] Deck Building FAQs, Town of Christiansburg, Virginia. Checked October 26, 2026.
- [3] 13VAC5-63-80. Section 108 Application for permit (Virginia Uniform Statewide Building Code), Virginia Administrative Code. Checked October 26, 2026.
- [4] How to Ensure the Safety of Your Decks, Fairfax County Government. Checked October 26, 2026.
- [5] CCA-Pressure Treated Wood: Guidance for Outdoor Wooden Structures, U.S. Consumer Product Safety Commission. Checked October 26, 2026.
- [6] Chromated Arsenicals (CCA), U.S. Environmental Protection Agency. Checked October 26, 2026.
- [7] Finishes for Wood Decks (revised July 2013), USDA Forest Service, Forest Products Laboratory. Checked October 26, 2026.
Want a pro to handle it?
Describe the job once. Licensed local businesses send quotes, and you pay only when you book one.
Get a quote from a local pro