What is the best way to roll paint on a ceiling?
Brush the edges first, then roll the open ceiling in small sections while the brushed paint is still wet, finishing each pass in one direction. Use flat ceiling paint, a 3/8-inch sleeve on a pole, a light load of paint and light pressure, keep a wet edge, and plan on two coats. Do not roll a textured ceiling until you know what it is.
Free to ask. Local shops send quotes, and you pay only when you book one.
By Kasra Taheri, Founder, LoclisPublished
Researched and drafted with AI, then checked claim by claim against the sources listed below before it was published. Prices and rules change; the dates beside each source say when it was last checked.
Step by step
Read when to stop and call a pro, further down this page, before you start.
Step 1: Cover and clear
Clear the room or cover the furniture and the floor, since rolling throws fine spatter overhead.
Step 2: Set up the ladder
Set the stepladder on a flat, level floor and never stand on its top two steps.[1]
Step 4: Prime stains
Seal any stain with a stain-blocking primer so it does not show through the ceiling coat.[3]
Step 5: Cut in the edges
Brush a band along every wall, around fixtures and around vents.[5]
Step 6: Load the roller lightly
Roll the sleeve along the roll-off area of the tray until it is evenly wet, not dripping.[5]
Step 7: Roll in small sections
Spread paint in a strip a few feet long, then smooth it with long parallel strokes in one direction, using light pressure.[5]
Step 8: Keep a wet edge
Start each reload on unpainted ceiling and work back into the wet paint, and do not stop mid-ceiling.[5]
Step 9: Add a second coat
Let the first coat dry, check it with a light held low along the surface, then apply a second coat.[5]
The short version
Brush the edges first, then roll the open ceiling in small sections while the brushed paint is still wet, and finish each pass in one direction. Use a flat ceiling paint, a roller on an extension pole, a thin even load of paint and light pressure. Most of what makes a ceiling look bad (lap marks, streaks, a visible frame around the edge) comes from letting a section dry before you blend into it.
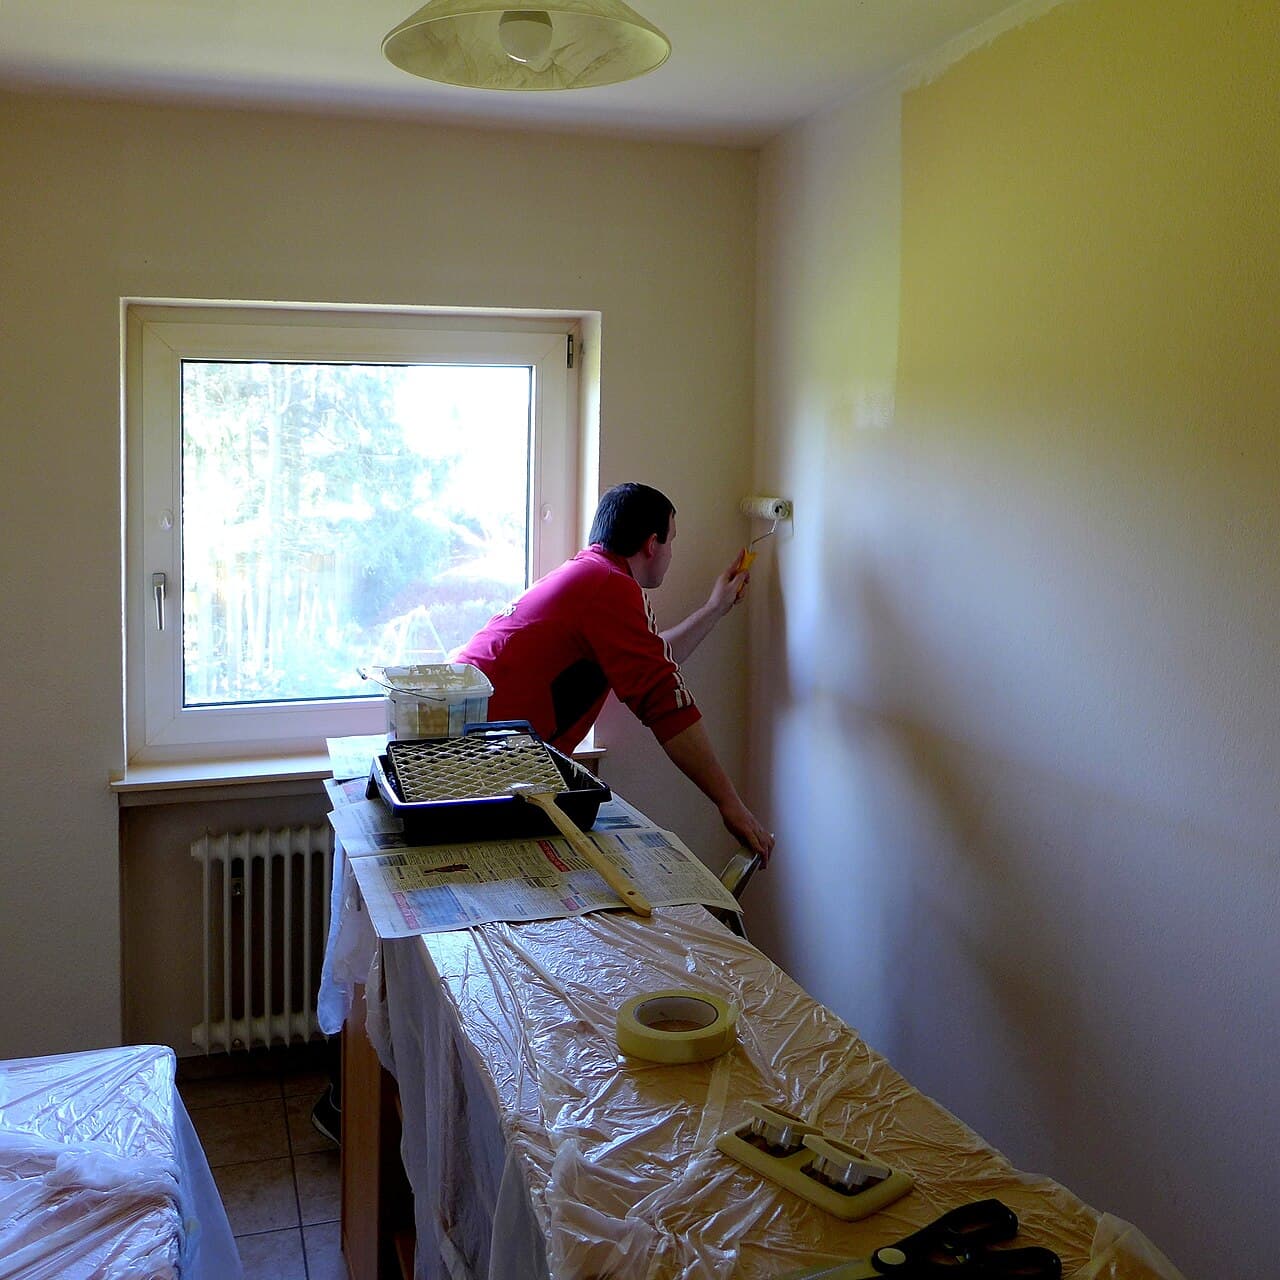
Get the room and the ladder ready
Clear the room or cover the furniture and the whole floor, because a roller throws fine spatter overhead. Mask light fixtures and tape the top of the walls if you are not repainting them.
Set the ladder before you start. Virginia Commonwealth University's ladder safety program says "Ladders shall be set-up on a flat, level surface" and keeps them out of doorways: they "shall not be placed in front of a door opening unless the door is blocked open, locked, or guarded".[1] It also says never to stand on the top two steps of a stepladder: "The top two steps of a stepladder and the top two rungs of a straight or extension ladder shall not be used for standing."[1] Move the ladder instead of reaching: "Do not overreach or lean too far to one side."[1]
Prepare the surface
Paint will not hide a bad surface. Benjamin Moore's advice for a cracked or flaking surface is blunt: "Painting over cracked paint is a bad idea; it is important to remove any flakes from the surface via sanding or scraping before repainting."[2]
A brown or yellow stain means water has been there. Sherwin-Williams' repair steps start with the cause: "Find and repair the source of water."[3] After that, take off any peeling paint and seal the stain with a stain-blocking primer before the ceiling coat, otherwise it tends to show through.[3]
If the house was built before 1978, read the lead note at the end of this page before you sand or scrape anything.
Choose the paint and the roller
Use a flat ceiling paint. Benjamin Moore says flat paint "is more forgiving of flaws and allows for excellent hide, creating a uniform surface."[4] That matters overhead, where light skims across the surface. It also warns that high gloss paints "require careful application and preparation best left to a professional painter", so a glossy ceiling is not the place to learn.[4]
For the roller, Benjamin Moore's guidance for walls, which carries over to a smooth ceiling, is that "A 3/8-inch sleeve works for most finishes, while a 1/4-inch sleeve is best for glossy finishes, and a thicker 1/2- or 3/4-inch sleeve is ideal for rough, textured walls."[5] A smooth ceiling takes the 3/8-inch sleeve; a lightly textured one takes the thicker nap. New sleeves shed lint, so "Wash and dry the roller sleeves to remove any loose fibers prior to painting walls."[5]
A roller on an extension pole lets you do most of the ceiling from the floor, which is easier on the neck and safer than a high ladder.
Cut in, then roll
Cutting in means painting the ceiling's edges with a brush so the roller does not have to touch them. Benjamin Moore defines it for walls: "Cutting in with a paintbrush means painting along the ceiling line, corners, windows, doors, molding, outlets, and switches prior to using a roller."[5] On a ceiling, that means a band along every wall and around fixtures and vents.
Load the roller lightly. Benjamin Moore says: "Begin loading your roller by rolling it along the raised roll-off area of the pan."[5] Repeat until the sleeve is evenly wet but not dripping.
Then roll. Start in a corner and paint a strip a few feet long, spreading the paint with a loose zigzag and then smoothing it with long parallel strokes, finishing every stroke in the same direction. Do not press hard. Benjamin Moore advises: "Apply only light pressure, letting the roller and the paint do the work. If you press too hard, you may create drips and runs."[5]
Keep the edge wet. When you reload, Benjamin Moore says: "Every time you reload the roller, begin a new row on an unpainted area and work back into the previously painted row."[5] Do the whole ceiling without a long break; stopping in the middle is the usual cause of a visible line.
Let the first coat dry fully, then check it from a low angle with a lamp or flashlight held along the surface. Thin spots show as patches. Benjamin Moore recommends at least two coats of a top coat for good hide and color.[5]
Fixing the usual problems
Lap marks and stripes mean a section dried before you blended into it, so work smaller sections on the second coat. Spatter means too much paint on the roller or too fast a stroke. A band around the edge that looks different means the brushed paint dried before the roller reached it, so cut in one wall at a time and roll straight after.
Textured ceilings and older homes
Do not roll a sprayed or popcorn texture without finding out what it is. EPA lists "Textured paint and patching compounds used on walls and ceilings" among the places where asbestos may be found.[6] See how to find out whether a popcorn ceiling has asbestos before you disturb one.
On lead, EPA says: "Any renovation, repair or painting project in a pre-1978 home or building that has lead-based paint can easily create dangerous lead dust."[8] It adds that "In general, the RRP Rule does not apply to homeowners doing RRP projects in their own pre-1978 homes", but that it does apply if you rent all or part of the home.[8] Rolling new paint over sound paint is a different matter from scraping or sanding old paint.
Stop and call a pro if
- The ceiling is a popcorn or sprayed texture in an older home. Leave it alone. EPA says "A trained and accredited asbestos professional should take samples for analysis" and "Don't saw, sand, scrape, or drill holes in asbestos-containing materials."[7]
- The paint is peeling or cracking in a home built before 1978. EPA recommends that homeowners hire a lead-safe certified contractor who is certified and trained in lead-safe work practices.[8]
- A stain is damp, bubbling or sagging. There is a leak above it. Fix the source first.[3]
- The ceiling is too high to reach from a stepladder. Read whether to hire a painter for high ceilings.
Getting help in Virginia
For the cost of having it done, see how much it costs to paint a ceiling in Virginia, and for the rest of a room, how to paint a room without getting paint on the ceiling. Browse more painting answers or the painting category for licensed local painters.
When you would rather hand it over, describe the ceiling and local painters will quote it.
Common questions
- Should I paint the ceiling or the walls first?
- The ceiling first. Drips and spatter then land on walls you have not painted yet, and the walls can be cut in against a finished ceiling line.
- What roller nap is best for a ceiling?
- Benjamin Moore's guidance for walls is a 3/8-inch sleeve for most finishes and a thicker 1/2- or 3/4-inch sleeve for rough, textured surfaces; a smooth ceiling is usually done with the 3/8-inch. Wash and dry a new sleeve first to remove loose fibers.
- Why does my ceiling look streaky after painting?
- Usually because paint dried before you blended into it, or you pressed too hard and rolled too fast. Work in small sections, keep a wet edge, use light pressure and apply a second coat once the first is dry.
- Can I paint a ceiling with a brush and no roller?
- You can, but it is slow and leaves brush marks across a large flat area. A brush is for the edges; a roller on an extension pole does the open ceiling.
- What sheen should a ceiling be?
- Flat. Benjamin Moore says flat paint is more forgiving of flaws and gives excellent hide and a uniform surface, which is what a ceiling needs.
Sources
- [1] Portable Ladder Safety Program, Virginia Commonwealth University, Safety and Risk Management. Checked October 27, 2026.
- [2] How to Prepare Walls for Painting, Benjamin Moore. Checked October 27, 2026.
- [3] How to Fix Water, Smoke and Other Paint Stains, Sherwin-Williams. Checked October 27, 2026.
- [4] How to Choose a Paint Finish, Benjamin Moore. Checked October 27, 2026.
- [5] How To Paint Interior Walls In 7 Easy Steps, Benjamin Moore. Checked October 27, 2026.
- [6] Learn About Asbestos, U.S. Environmental Protection Agency. Checked October 27, 2026.
- [7] Protect Your Family from Exposures to Asbestos, U.S. Environmental Protection Agency. Checked October 27, 2026.
- [8] Lead Renovation, Repair and Painting Program, U.S. Environmental Protection Agency. Checked October 27, 2026.
Want a pro to handle it?
Describe the job once. Licensed local businesses send quotes, and you pay only when you book one.
Get a quote from a local pro