How do I recaulk a bathtub?
Cut and scrape out every bit of the old caulk, clean off any mold, wipe the joint with rubbing alcohol and let it dry completely. Then run one steady bead of 100% silicone kitchen and bath sealant, smooth it within a few minutes, and keep water off it for as long as the label says. Silicone cannot be painted, so choose the colour first.
Free to ask. Local shops send quotes, and you pay only when you book one.
By Kasra Taheri, Founder, LoclisPublished
Researched and drafted with AI, then checked claim by claim against the sources listed below before it was published. Prices and rules change; the dates beside each source say when it was last checked.
Step by step
Read when to stop and call a pro, further down this page, before you start.
Step 1: Choose the sealant
Buy a 100% silicone kitchen and bath sealant in white, clear or almond to match the tub, since silicone cannot be painted.[1]
Step 2: Check the use-by date
Look at the date on the cartridge; expired sealant may have difficulty curing, or may not cure at all.[3]
Step 3: Score the old bead
Run a utility blade along both edges of the old caulk, taking care not to scratch the tub or tile.[2]
Step 4: Pull and scrape it out
Peel out as much as you can by hand, then scrape off what is left with a plastic caulk tool or the blade.[2]
Step 5: Clear the residue
Rub leftover silicone off tile or fiberglass with mineral spirits and a non-abrasive pad; use rubbing alcohol instead on hard plastic or painted surfaces.[3]
Step 6: Deal with any mold
If mold is growing in the joint, scrub it off and let the area dry fully before you go on; never caulk over it.[6]
Step 7: Wipe and dry
Wipe the whole joint with isopropyl alcohol on a paper towel, keep the room ventilated, and let it dry completely.[2]
Step 8: Tape the edges
Run painter's tape along both sides of the joint so the finished bead has clean, straight edges.[1]
Step 9: Fill a fiberglass tub
For a fiberglass tub, fill it with water first so the joint is sealed while the tub is flexed under the weight.[1]
Step 10: Cut the nozzle
Cut the nozzle at a 45-degree angle, starting small, and pierce the inner foil seal before loading the gun.[1]
Step 11: Run the bead
Squeeze with steady pressure and pull the gun toward you along the joint, one side of the tub at a time.[1]
Step 12: Smooth it straight away
Tool the bead with a gloved finger or caulk tool within 5 to 10 minutes, then pull the tape before the surface skins.[3]
Step 13: Let it cure
Keep water off it for the full time on the label and do not touch or clean it for 24 hours, then drain the tub.[3]
Recaulking a bathtub is one of the most useful small jobs in a house, and most people can do it in an afternoon. The order matters more than the product: get every bit of old caulk out, clean and dry the joint, lay one continuous bead of 100% silicone kitchen and bath sealant, smooth it within minutes, and leave it alone until it has cured. Plan on the tub being out of use for at least a day.
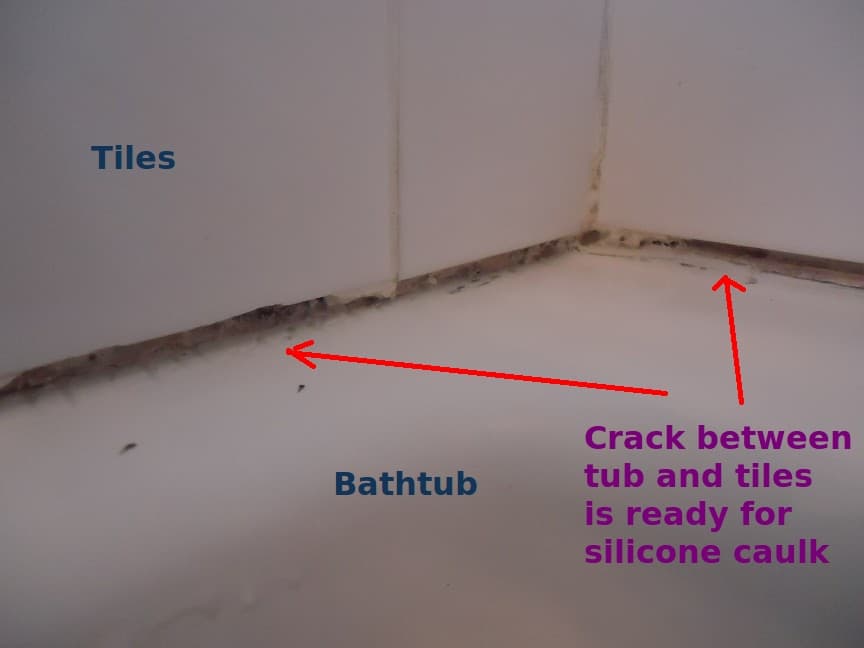
What you need
- A tube of 100% silicone kitchen and bath sealant and a caulking gun
- A utility knife or razor blade in a holder, and a plastic caulk removal tool
- Isopropyl (rubbing) alcohol, paper towels and painter's tape
- Mineral spirits and a non-abrasive scrub pad, if old silicone residue will not come off
- Disposable gloves, and a caulk smoothing tool if you prefer not to use a finger
Pick the colour before you start. 100% silicone sealants are not paintable,[1] so white, clear or almond is what you will live with.
Silicone or acrylic?
For the joint where the tub meets the wall, silicone is the usual choice: it stays flexible, sticks well to tile, glass and fiberglass, and is waterproof once cured.[3] GE's guidance is to use paintable acrylic "caulk" for dry, painted trim and silicone "sealant" where "water, movement, or durability matters."[5]
Acrylic or siliconized acrylic still has a place, mainly where you want to paint over the bead. It is slower to be ready, though: GE's acrylic kitchen and bath sealant is 24-hour water-ready and takes 1 to 14 days or longer to cure.[4]
Getting the old caulk out
This is the part that decides whether the new bead lasts. The maker's FAQ says applying new sealant over old is possible but not ideal, because the old sealant may prevent proper adhesion.[5] Score both edges of the old bead, peel it out in strips where it lets go, and scrape off what is left. A plastic tool is kinder to an acrylic or fiberglass tub than a metal blade.
Old silicone leaves a thin film that is easy to miss. There is no substance that will dissolve silicone,[3] so it has to come off mechanically. The GE data sheet suggests mineral spirits and a non-abrasive pad on ceramic tile and fiberglass, but on hard plastics or painted surfaces it calls for rubbing alcohol and a soft cloth, not mineral spirits.[3] Either way, test mineral spirits on a hidden spot first.[3]
Finish with an alcohol wipe and let the joint dry completely. Skip the soapy water at this stage: cleaning surfaces with soap and water is not recommended before silicone, because it will not adhere where any soap scum or residue is left.[3] Mineral spirits and alcohol are both flammable, so keep them away from sparks and flames and work with the room ventilated.[3]
If there is mold in the joint
Black spots under or inside the old bead are common. Get rid of them before you seal; EPA's guidance is blunt: "Do not paint or caulk moldy surfaces."[6] Its advice is to scrub mold off hard surfaces with detergent and water and dry them completely,[6] then do your final alcohol wipe once the joint is dry. Wear gloves. If you use bleach, never mix chlorine bleach with cleaners that contain ammonia, because toxic fumes can result.[6]
If the mold covers more than about 10 square feet, or there has been a lot of water damage, EPA points you to professional remediation guidance[6] rather than a weekend clean-up.
Laying the bead
Tape both sides of the joint for a clean line. For a fiberglass tub, fill it with water first. Tubs naturally sink and flex under the weight of the water,[1] and sealing it full means the bead is compressed, not stretched, every time the tub empties.
Cut the nozzle at an angle and a little smaller than you think, since you can always cut more. Run the bead with steady pressure, moving at an even speed, and do one side of the tub at a time so you can smooth each run before it starts to set.
Size matters. For this product, GE says to use a backer rod for gaps larger than 3/8 inch deep by 3/8 inch wide, and keep the bead no thicker than 1/2 inch and no thinner than 1/8 inch.[3] Most tub joints are much narrower than that and take a single modest bead.
Smoothing and curing
Smooth the bead with a gloved finger or a caulk tool, pressing lightly so it wets both the tub and the wall. The data sheet says to tool the bead within 5 to 10 minutes,[3] and warns that over-tooling, or tooling the bead too thin, weakens the seal.[3] Pull the tape straight away: remove the masking tape immediately after tooling, before the sealant begins to skin over, which takes about 30 minutes.[3]
"Water-ready" times on the front of a tube come with conditions. GE's Advanced Silicone 2 allows water exposure in 30 minutes only for a bead no wider than 3/16 inch at 65°F or warmer and at least 50% humidity; otherwise it should not get wet for 8 hours, and you should not touch or clean it for 24 hours.[3] The same sheet notes cure time is significantly longer in cold or dry conditions.[3] For best performance, it recommends applying the sealant at 70°F,[3] so a heated bathroom in a Virginia winter is fine, but a cold, closed-up room is not.
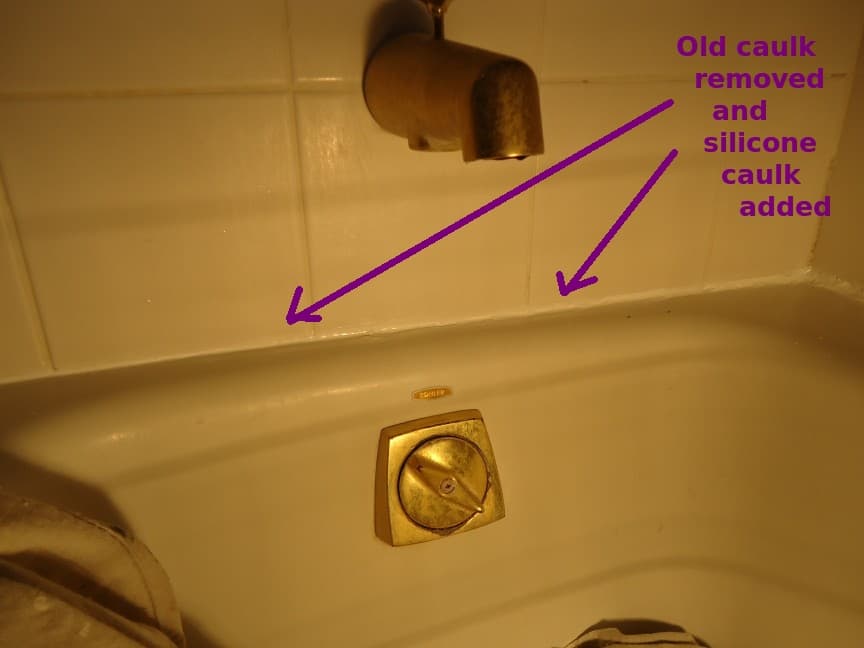
Making it last
Mold-resistant labels help, but they do not replace cleaning. GE's data sheet says cured silicone resists mold, but it still needs regular cleaning, because soap and other residue can grow mold on its surface.[3] Moisture control does the rest. EPA's advice is simple: "Run the bathroom fan or open the window when showering."[6]
Stop and call a pro if
- The wall behind the joint is soft, tiles are loose or the grout is crumbling: water has already got behind the surface.
- You see a stain or soft spot on the ceiling below the tub, or the floor beside it feels spongy.
- The tub itself is cracked, rocks, or moves visibly when you step in.
- The gap is wider than a backer rod and one bead can fill, or it opens up again soon after you seal it.
- Mold covers a large area, keeps coming back from inside the wall, or anyone in the house has health concerns about cleaning it.
For what comes next, see how often to recaulk a shower and why caulk keeps cracking. If you would rather not do it yourself, read whether to hire someone to recaulk your bathroom, browse handyman services or the other handyman answers, or describe the tub or shower job once and local businesses quote it.
Common questions
- Can I put new caulk over the old caulk?
- It is better not to. GE's own guidance is that it can be done but is not ideal, because the old bead may keep the new one from bonding. Cut the old bead out, clean the joint and let it dry first.
- Should I use silicone or acrylic caulk around a tub?
- For the joint where the tub meets the wall, a 100% silicone kitchen and bath sealant is the usual choice: it stays flexible and is waterproof once cured. Acrylic or siliconized acrylic is easier to clean up and can be painted, but GE's acrylic kitchen and bath product needs 24 hours before water and can take days to cure.
- How long before I can shower after recaulking?
- Follow the label on your tube. GE's Advanced Silicone 2 can take water in 30 minutes only with a thin bead in a warm, humid room; otherwise the maker says to wait 8 hours, and not to touch or clean it for 24 hours. Acrylic products usually need longer.
- Why fill the tub with water before caulking?
- A tub, especially a fiberglass one, sinks and flexes slightly when it is full. Caulking it full means the joint is sealed at its widest, so the bead is squeezed rather than stretched when the tub drains, and it moves with the tub each time you fill and empty it.
- What if the gap behind the old caulk is very wide?
- GE's data sheet calls for foam backer rod in gaps larger than 3/8 inch deep by 3/8 inch wide, so the bead stays a sensible thickness. A gap that wide around a tub can also mean the tub or wall has moved, which is worth having looked at before you seal it.
Sources
- [1] How to Caulk a Bathtub the Right Way to Prevent Mold & Leaks (updated September 22, 2026), GE Sealants (Henkel Corporation). Checked October 27, 2026.
- [2] How to Remove Old Caulk or Sealant the Right Way (updated December 10, 2025), GE Sealants (Henkel Corporation). Checked October 27, 2026.
- [3] Advanced Silicone 2 Kitchen & Bath Sealant technical data sheet (revision August 15, 2025), Henkel Corporation (GE Sealants). Checked October 27, 2026.
- [4] Advanced Siliconized Acrylic Kitchen & Bath Sealant technical data sheet (June 1, 2024), Henkel Corporation (GE Sealants). Checked October 27, 2026.
- [5] Frequently Asked Questions, GE Sealants (Henkel Corporation). Checked October 27, 2026.
- [6] A Brief Guide to Mold, Moisture and Your Home, U.S. Environmental Protection Agency. Checked October 27, 2026.
Want a pro to handle it?
Describe the job once. Licensed local businesses send quotes, and you pay only when you book one.
Get a quote from a local pro