Why does my caulk keep cracking?
Caulk that keeps cracking is usually the wrong product for a joint that moves, a bead laid too thin or stuck to the back of the joint, or new caulk put on a dirty or old surface it cannot grip. Acrylic caulk also shrinks as it cures. Cut it all out, clean the joint and use a flexible sealant sized to the gap.
Free to ask. Local shops send quotes, and you pay only when you book one.
By Kasra Taheri, Founder, LoclisPublished
Researched and drafted with AI, then checked claim by claim against the sources listed below before it was published. Prices and rules change; the dates beside each source say when it was last checked.
Step by step
Read when to stop and call a pro, further down this page, before you start.
Step 1: Look at how it failed
Note whether the caulk has pulled away from one side of the joint or split down the middle; each points to a different cause.[1]
Step 2: Check for movement
Watch the joint while someone steps into the tub or presses on the trim; a joint that visibly opens needs a more flexible sealant.
Step 3: Cut out all the old caulk
Score both edges with a utility blade and scrape the joint clean, since new caulk does not bond well to old.[2]
Step 4: Clean and dry the joint
Wipe both surfaces with isopropyl alcohol and let them dry; skip soap, because its residue keeps silicone from sticking.[3]
Step 6: Fill deep gaps with backer rod
Press foam backer rod into joints deeper than 1/4 inch or wider than 1/2 inch so the caulk does not stick to the bottom.[2]
Step 7: Fill the tub first
For a fiberglass tub, fill it with water before sealing so the joint is caulked at its widest.[5]
Step 8: Lay a full bead
Apply a continuous bead thick enough to bridge the gap, at least 1/8 inch for GE's silicone, and tool it right away.[3]
Step 9: Let it cure before painting
Wait at least 24 hours before painting a paintable caulk, and never paint 100% silicone.[2]
Caulk that keeps cracking is almost never bad luck. In most cases one of four things is going on: the joint moves more than the product can stretch, the bead is too thin or stuck to the back of the joint, the new caulk was put on a surface it could not grip, or the caulk shrank as it cured. Fixing it means cutting out the old bead, working out which of these applies, and resealing with the right product the right way.
GE's sealant FAQ sums up the usual culprits: caulk applied too thin or over a moving joint, painted too soon before the caulk cured, acrylic caulk that shrinks when overfilled, and brittle paint that cannot stretch with the joint.[2]
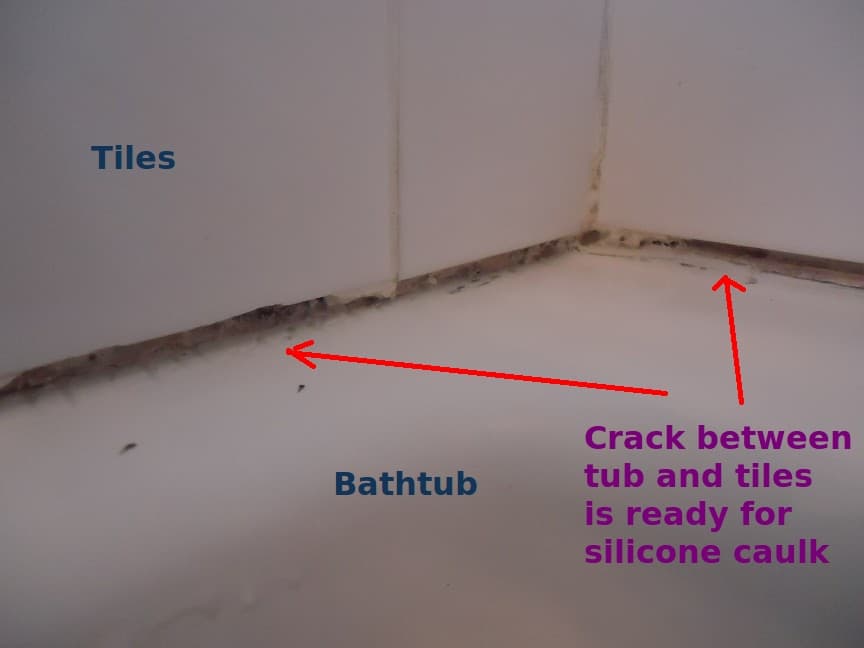
Read the crack first
Look closely at how the old bead failed. If it has peeled cleanly off one surface, that is an adhesion failure, and the Forest Products Laboratory notes that "adhesive failure between caulk and substrate is the most common failure mode."[1] The fix is better surface preparation. If the bead has split down the middle while still stuck to both sides, that is cohesive failure or chemical breakdown of the caulk itself,[1] and usually means the product could not handle the movement or was laid too thin.
The joint moves more than the caulk can stretch
Every caulked joint moves a little, and some move a lot. Around a bathtub, the tub is the moving part: tubs naturally sink and flex under the weight of the water,[5] so the joint opens and closes every time you fill and drain it. Trim and siding move with temperature and humidity.
Narrow joints suffer most. In narrow joints, a given amount of movement between the two surfaces means a relatively large strain on the caulk,[1] so a hairline bead tears long before a wider one would.
Products differ widely in how much they can take. ASTM C920 sorts sealants into classes by how much movement they tolerate, from Class 100/50 down to Class 12½.[1] GE lists plus or minus 35% movement for its Advanced Silicone 2 kitchen and bath sealant[3] and plus or minus 25% for its siliconized acrylic.[4]
Acrylic caulk shrinks
Water-based acrylic (latex) caulk loses volume as it dries. On the C920 shrinkage limit, the Forest Products Laboratory reports: "Latex acrylic caulks usually shrink enough during extended cure that they will not meet this particular requirement for conformance with C 920."[1] GE's siliconized acrylic kitchen and bath data sheet lists shrinkage of up to 30% for the clear version.[4] A bead that shrinks thins out in the middle, and the thin spot is where it cracks.
The bead is the wrong shape
How the caulk sits in the joint matters as much as which caulk it is. If the caulk sticks to the back of a joint, or into the inside corner where two surfaces meet, stress concentrates in the bead when the surfaces move,[1] and the joint is likely to fail even with a high-performance sealant. GE's advice is to use a backer rod for joints deeper than 1/4 inch or gaps wider than 1/2 inch, to prevent 3-point adhesion that can cause cracking over time.[2]
Depth counts too. A general rule from the FPL report is that for joints up to half an inch wide, the depth of the caulk should not exceed its width.[1] GE's silicone data sheet calls for beads no thinner than 1/8 inch and no thicker than 1/2 inch, with a width-to-depth ratio of 2:1.[3] A smear thinner than that, or a joint packed deep with caulk, both crack sooner.
It never stuck properly
"Nothing adheres well to a dirty surface."[1] In a bathroom the usual contaminants are soap film, body oil and the thin layer old silicone leaves behind. GE's data sheet says silicone will not adhere to surfaces with any soap scum or residue present,[3] which is why the final wipe should be alcohol, not a soapy rag.
Caulking over old caulk is the other common cause. GE's FAQ says applying new sealant over the old bead is possible but not ideal, because the old sealant may prevent proper adhesion.[2] The new bead peels off with the old one.
It cured badly
Temperature, humidity and the age of the tube all matter. latex sealants cannot go on below about 40°F,[1] and in heat, the caulk can skin over before it is tooled, which compromises adhesion.[1] Check the date as well: some expired caulks still pump easily from the tube but never cure,[1] and latex caulk that froze in storage should be thrown out.[1]
Paint is doing the cracking
Sometimes the caulk is fine and the paint is not. Paint over paintable caulk too soon, or with a brittle paint, and the paint film splits as the joint moves. GE says to wait at least 24 hours before painting a paintable caulk,[2] and that paint will not stick to 100% silicone, and primer will not help.[2]
And some is just age
No caulk lasts forever. As the Forest Products Laboratory puts it: "Caulk joints cannot be expected to remain functional indefinitely; leakage will eventually occur."[1] A bead that lasted years before cracking has done its job; one that cracks within months had a problem from the start.
Stop and call a pro if
- The same joint reopens within weeks of being redone properly.
- The gap keeps getting wider, or a tub or shower pan moves visibly when you step in.
- Tiles near the joint are loose or cracked, or grout is crumbling.
- There are water stains, soft drywall or a musty smell near the joint.
- Cracks run through drywall, plaster or trim away from the caulk line as well.
To redo the joint, follow our guide to recaulking a bathtub, then see how often to recaulk a shower. For outside joints, see how often to check exterior caulk and weatherstripping. You can browse the other handyman answers and handyman services, or describe the job once and local businesses quote it.
Common questions
- Why does the caulk around my tub crack every year?
- A tub moves: it sinks and flexes when it is filled and settles back when it drains. A thin bead, an acrylic caulk with little movement capacity, or caulk laid with the tub empty is stretched every time. Recaulk with a flexible silicone, and fill a fiberglass tub with water before sealing.
- Is it better to use silicone or acrylic caulk to stop cracking?
- Where the joint moves or gets wet, silicone usually lasts longer: GE rates its kitchen and bath silicone at plus or minus 35% movement against 25% for its siliconized acrylic. Acrylic is easier to tool and can be painted, which is why it is used on trim, but it shrinks as it cures.
- Why does painted caulk crack?
- Two common reasons: the caulk was painted before it had cured, or the paint film is more brittle than the caulk and splits when the joint moves. Let paintable caulk cure for at least a day first. Silicone cannot be painted at all, so use a paintable product where paint is needed.
- Can I just add a new layer over the cracked caulk?
- It rarely lasts. New caulk does not grip old caulk well, and the original failure is still underneath. Cut out the old bead completely, clean the joint with alcohol, let it dry and start fresh.
- When does cracking caulk mean something more serious?
- When the same joint reopens within weeks, the gap keeps getting wider, tiles nearby loosen, or there are water stains or soft spots near the joint. That points to movement or water damage in the structure behind it, which caulk cannot fix.
Sources
- [1] The Ins and Outs of Caulking (FPL-GTR-169, May 2006), USDA Forest Service, Forest Products Laboratory. Checked October 26, 2026.
- [2] Frequently Asked Questions, GE Sealants (Henkel Corporation). Checked October 27, 2026.
- [3] Advanced Silicone 2 Kitchen & Bath Sealant technical data sheet (revision August 15, 2025), Henkel Corporation (GE Sealants). Checked October 27, 2026.
- [4] Advanced Siliconized Acrylic Kitchen & Bath Sealant technical data sheet (June 1, 2024), Henkel Corporation (GE Sealants). Checked October 27, 2026.
- [5] How to Caulk a Bathtub the Right Way to Prevent Mold & Leaks (updated September 22, 2026), GE Sealants (Henkel Corporation). Checked October 27, 2026.
Want a pro to handle it?
Describe the job once. Licensed local businesses send quotes, and you pay only when you book one.
Get a quote from a local pro