How do I replace a rotted fascia board?
On a single-storey eave you can reach safely from a ladder, take down the gutter, probe to find where the rot stops, and cut the soft fascia out back to sound wood over a rafter. Fit a new board primed on every face and cut end, nail it into the rafter tails, caulk, paint and rehang the gutter. Soft rafter tails or roof decking mean calling a pro.
Free to ask. Local shops send quotes, and you pay only when you book one.
By Kasra Taheri, Founder, LoclisPublished
Researched and drafted with AI, then checked claim by claim against the sources listed below before it was published. Prices and rules change; the dates beside each source say when it was last checked.
Step by step
Read when to stop and call a pro, further down this page, before you start.
Step 1: Check the age of the house
If the house was built before 1978, or you cannot find out, assume the paint contains lead and use lead-safe work practices, or hire a lead-safe certified contractor, which is what EPA recommends for pre-1978 homes.[3]
Step 2: Set the ladder up properly
Put the base out one-fourth of the height to the eave, let the top extend 3 feet above it, and skip the job in wind over 20 miles per hour.[4]
Step 3: Probe the fascia and rafter ends
Push a small screwdriver into the fascia, especially at joints and bottom edges, and into the rafter ends behind it, marking where the wood turns firm.[1]
Step 4: Take down the gutter
Remove the hangers along the rotted length and lower the gutter with a helper, or support it so it does not kink.
Step 5: Free the soffit edge and trim
Ease off any fascia cover and trim, and unfasten soffit panels that are nailed into the fascia so they can drop slightly.
Step 6: Mist and score the paint
Mist painted surfaces before cutting or prying to keep dust down, and lay plastic sheeting on the ground below.[3]
Step 7: Cut out the rotted length
Cut square through the fascia over the middle of a rafter tail on each side of the rot so both new joints land on solid wood.
Step 8: Look at what was behind it
Check the rafter tails, any sub-fascia and the edge of the roof decking; if they are soft, stop and call a pro.
Step 9: Cut the new board to match
Match the old board's width and thickness, and use the old piece as a pattern for length and any angled ends.
Step 10: Prime every face first
Back-prime the new board with one coat and give the cut ends two coats of primer before it goes up.[2]
Step 11: Fit it under the drip edge
Slide the top edge up behind the drip edge without bending it, then nail into each rafter tail with corrosion-resistant nails such as stainless steel.[2]
Step 12: Caulk, fill and paint
Fill nail holes, caulk the end joints, and topcoat soon after priming so no bare wood is left exposed.[2]
Step 13: Refit the soffit and gutter
Re-fasten the soffit and trim, and rehang the gutter so it slopes at least 1/16 inch per foot toward the downspout.[7]
Step 14: Clean up
Collect chips and dust on the sheeting, bag the waste, and finish with a HEPA vacuum and wet wiping.[3]
On a single-storey house, replacing a rotted fascia board is a day's carpentry: take the gutter down, cut out the soft wood back to solid wood over a rafter, fit a new board that has been primed on every face and cut end, nail it into the rafter tails, and paint it before you rehang the gutter. The job stops being a DIY job when the rot has gone past the fascia into the rafter ends or roof decking, or when the eave is above the first storey.
What fascia does and why it rots
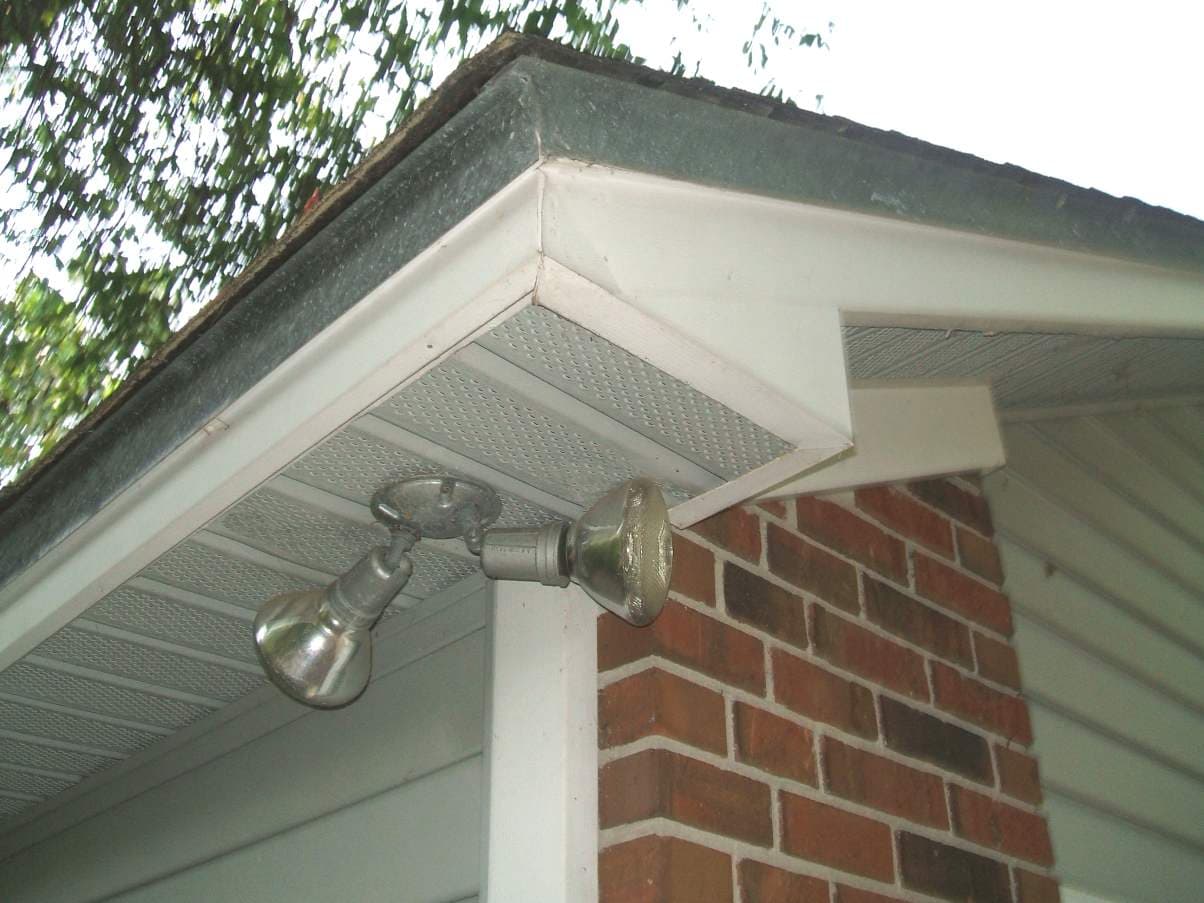
The fascia is the board along the lower edge of the roof. The gutter hangs on it, the soffit meets it underneath, and the roof's drip edge laps over its top. Water that gets under the shingle edge can run back onto the fascia, and overflowing gutters soak it from the front.
Wood rots where it stays wet, and fascia has plenty of end grain at joints and corners. Because liquid water enters wood 10 to 100 times faster through the end grain than through the other faces,[1] rot usually starts at a joint, a corner or the bottom edge. It can be further along than it looks: decay often sits in the center of a board while the surface still looks sound.[1] Peeling paint is often the first sign. "Decayed wood does not hold paint."[1]
Whatever you replace, fix the water source too. "All decay, and most exterior paint failures, start with moisture."[1]
Before you start
Reach. This guide is for eaves you can work from a ladder on firm, level ground, usually a one-storey wall or a porch roofline. The ladder rules safety programs teach are simple: set the base out one-fourth of the height to the point where the ladder rests, let the top extend at least 3 feet above the eave, never stand on the top two rungs, and keep three points of contact.[4] Ladders should not be used outdoors in wind over 20 miles per hour.[4] Move the ladder often rather than leaning out to reach.
Old paint. Fascia on older houses has usually been painted many times. If the house was built before 1978, plan for lead; the EPA advises assuming the paint contains lead if you cannot determine the age of the house.[3] EPA recommends that homeowners hire a lead-safe certified contractor for any such project in a pre-1978 home.[3] If you do it yourself, its lead-safe practices for homeowners include misting surfaces before you scrape, drill or cut, a disposable N-100 respirator, and a HEPA vacuum for cleanup.[3]
Permits. Swapping boards rarely needs one. In Virginia, the Uniform Statewide Building Code lists installation or replacement of trim, and application of paint, among the ordinary repairs that need no permit application.[5] Fascia is not named in that list, and a building official may still require a permit for exempt work in a special flood hazard area,[5] so call your local building department if the job grows into rafter repair.
Picking the new board
Wood. A clear, straight board that matches the old width and thickness is the simplest swap. Avoid relying on finger-jointed stock if you can. Finger-jointed lumber is common for fascia boards, and paint on it often fails in a patchwork pattern or at a joint where the pieces on either side move differently.[1]
Cellular PVC. Cellular PVC such as Versatex does not swell or shrink with moisture the way wood does,[6] which makes it a reasonable choice where water keeps coming back. It moves with temperature instead: expansion and contraction is an issue on long runs of rake or fascia made of three or more 18-foot boards.[6] Versatex calls for fasteners that penetrate a full 1 1/4 inches into the framing, placed no more than 2 inches from the end of a board,[6] and if you paint it, paint colors with a light reflective value of 55 or greater.[6]
Metal or vinyl covers. Many houses have wood fascia wrapped in aluminum or vinyl. A cover is only as good as the wood behind it, so replace the rot before you wrap anything, and follow the cover maker's fastening instructions if you refit one.
Doing the work
The steps on this page give the order. A few points make the difference between a repair that lasts and one you redo in three years.
Find the real edges of the rot. Probe along the board and into the rafter ends with a small screwdriver. Cut back until the screwdriver no longer sinks in, and put each cut over the middle of a rafter tail so both boards have something solid to nail into.
Mind the soffit. On many houses the soffit is fastened to the back of the fascia, so those fasteners have to come out, or the panels be eased loose, before the old board will.
Prime before it goes up. The National Park Service's maintenance guidance is to back-prime installed wood with one coat of primer and coat exposed end grain with two coats.[2] The Forest Products Laboratory is just as direct: "Priming before installation (even in your garage) is the best way to extend paint life."[1] Prime the cut ends of the old fascia left in place, too.
Use nails that will not rust. The Park Service suggests stainless steel or high strength aluminum nails[2] for exterior wood. Nail into each rafter tail, set the heads, and fill.
Respect the drip edge. Slide the new board up behind the drip edge without bending or lifting the roofing. If the drip edge is missing, rusted through or has to come off for the board to fit, that part is roof work.
Rehang the gutter with fall. Building scientists recommend gutters slope at least 1/16 inch per foot of run[7] toward the downspout, so water does not sit against the new board.
Stop and call a pro if
- The rafter tails, sub-fascia or roof decking are soft, or the roof edge sags. That is framing or roof repair, not trim.
- The drip edge or the first course of shingles has to be removed or replaced.
- The eave is above the first storey, over a slope, or over a deck or stairs where a ladder cannot stand firmly.
- You find mud tubes or tunnels in the wood. "A termite tunnel is a sure sign of infestation."[1] Carpenter ants are a warning too: "Presence of carpenter ants may indicate decay and/or moisture in the structure."[1]
- Animals, bees or wasps are living behind the fascia or in the soffit.
- The house was built before 1978 and the job means disturbing a lot of old paint; EPA recommends a lead-safe certified contractor for that.
Getting help
If the rot turns out to be bigger than a board or two, see what soffit and fascia replacement costs in Virginia and whether to call a roofer or a siding contractor. To keep the new board sound, read how to keep soffits and fascia from rotting; for window and door casings, see how to replace rotted exterior trim. Browse soffit and fascia businesses, find exterior pros around Blacksburg, or read more exterior answers. When you would rather hand it off, describe the soffit or fascia repair once and licensed local businesses will quote it.
Common questions
- Can I replace just the rotted section of fascia?
- Yes. Cut the fascia square over the middle of a rafter tail on each side of the rot, so each new joint lands on solid wood, and fit a new piece between the cuts. Prime the cut ends of both the old and new boards before the new piece goes up, then caulk the joints and paint.
- Should I wrap rotted fascia in aluminum instead of replacing it?
- Not over soft wood. A metal or vinyl fascia cover is fastened into the wood behind it, and covering rot usually hides it rather than stopping it. Replace the soft wood first; a cover over a sound, primed board is a fair choice if you want less painting.
- Do I need a permit to replace fascia in Virginia?
- Usually not for the boards themselves. The Uniform Statewide Building Code lists installation or replacement of trim, and painting, among ordinary repairs that need no permit application, though a building official can still require one in a special flood hazard area. If rafter tails or framing need repair, ask your local building department before you start.
- What wood should I use for new fascia?
- A clear, solid board that holds paint, primed on all faces and cut ends before installation. Finger-jointed boards are common for fascia but paint often fails at their joints. Cellular PVC does not absorb moisture and is a good alternative where water keeps coming back, as long as you follow its fastening and paint color rules.
- Why did my fascia rot in the first place?
- Almost always water: a gutter that overflows or sits tight against the board, a missing or bent drip edge, or unsealed end grain at joints and corners. Find and fix the source, or the new board will rot the same way.
Sources
- [1] Chapter 16: Finishing Wood, Wood Handbook (FPL-GTR-282), USDA Forest Service, Forest Products Laboratory. Checked October 27, 2026.
- [2] Preservation Brief 47: Maintaining the Exteriors of Small and Medium Size Historic Buildings, National Park Service. Checked October 27, 2026.
- [3] Lead-Safe Renovations for DIYers, U.S. Environmental Protection Agency. Checked October 27, 2026.
- [4] Portable Ladder Safety Program, Virginia Commonwealth University, Safety and Risk Management. Checked October 27, 2026.
- [5] 13VAC5-63-80. Section 108 Application for permit (Virginia Uniform Statewide Building Code), Virginia Administrative Code (Virginia General Assembly). Checked October 27, 2026.
- [6] VERSATEX Installation Guidelines (Rev 12/23), Versatex Building Products. Checked October 27, 2026.
- [7] Gutters and Downspouts (Building America Solution Center), Pacific Northwest National Laboratory for the U.S. Department of Energy. Checked October 27, 2026.
Want a pro to handle it?
Describe the job once. Licensed local businesses send quotes, and you pay only when you book one.
Get a quote for Roofing